IdP4:安装IdP4.1.7(第3/11步)
- carsi_pku_team
Owned by carsi_pku_team
1.下载安装脚本和相应的软件 (请使用学校负责老师的邮箱发邮件给carsi@pku.edu.cn 要4.1.7版本的安装脚本文件)
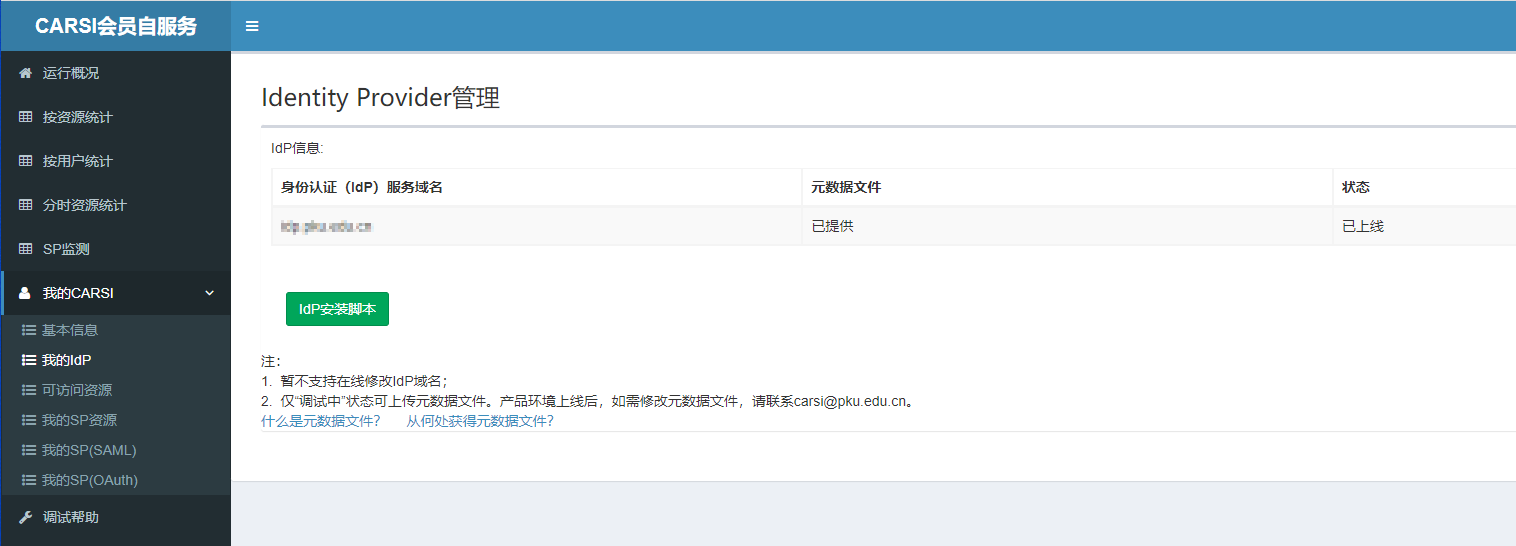
登录mgmt.carsi.edu.cn自服务系统,“我的CARSI”-“我的IdP”下载安装脚本:idp_install_script.zip. 下载后解压后即是:idp4.1.7-centos7-jetty-install.sh,如下图所示:
使用carsi用户登录操作系统并下载以下脚本和软件:
[carsi@www ~]$ curl -O  https://ds.carsi.edu.cn/4.1inst/v1/java-11-openjdk-devel-11.0.10.0.9-1.el7_9.x86_64.rpm
[carsi@www ~]$ curl -O  https://ds.carsi.edu.cn/4.1inst/v417/shibboleth-identity-provider-4.1.7.tar.gz
[carsi@www ~]$ curl -O  https://ds.carsi.edu.cn/4.1inst/v1/jetty-distribution-9.4.42.v20210604.zip

#核对所下载文件的md5值是否和下述md5值一致,如果不一致可能是下载异常,请重新下载
[carsi@www ~]$ md5sum java-11-openjdk-devel-11.0.10.0.9-1.el7_9.x86_64.rpm shibboleth-identity-provider-4.1.7.tar.gz jetty-distribution-9.4.42.v20210604.zip idp4.1.7-centos7-jetty-install.sh
f544eb679e8dbb07fc6b72835dacea5c  java-11-openjdk-devel-11.0.10.0.9-1.el7_9.x86_64.rpm
d123491e1dc2b67a896a34a1e220e0df  shibboleth-identity-provider-4.1.7.tar.gz
ebd4be67639543267fb854f7c6cb3e56  jetty-distribution-9.4.42.v20210604.zip
64050f433ffbefef5ef3ffe3d55b1534  idp4.1.7-centos7-jetty-install.sh

#赋予脚本可执行权限
[carsi@www ~]$ chmod 755 idp4.1.7-centos7-jetty-install.sh
2.安装IdP
运行idp4.1.7-centos7-jetty-install.sh并开始安装IdP,整个安装过程分为五个部分:运行环境检测、安装java、nginx、Jetty基础软件、安装IdP软件、选择认证对接方式和重新编译war文件,详细描述如下:
注:因技术限制,安装脚本的输出内容不能被全部自动收集,建议手工保存屏幕输出,便于后续分析安装过程发生的问题。
2.1 运行环境检测
[carsi@www ~]$ sudo sh ./idp4.1.7-centos7-jetty-install.sh
Install shibboleth idp at 2021.09.08 15:18:24
Shibboleth IdP 4.1.7 is installing.
Script Version v4.1.7.1
Checking Internet access...
Check Internet access success!
Setting timezone...
Install tar ...
Install zip and unzip...
Testing installing envirenment...
Check shibboleth idp installation file success!
Check Jetty installation file success!
如果服务器已经安装了IdP v3版本,可能会安装失败。从老版本升级到IdPv4.1.7,请参照IdP4:将IdP 从v3.4.3/v3.4.7升级到v4.1.7。
You are upgrading IdP from 3.4.3/3.4.7 to 4.1.7. We suggest to setup another environment to install IdP 4.1.7 and reset the dns record instead of upgrading from the old system.
If you still insist to upgrade the old system to IdP 4.1.7, please make sure you have made a backup of data. You will take some risks for the installation.
注意:如果IdP已经上线,如果需要重新安装配置IdP,我们强烈建议搭建新的虚机重新安装配置IdP,安装完成后可以将credentials和metadata目录下文件复制到新环境,便可以快速恢复IdP。重装后如何恢复IdP请参考IdP4:IdP服务器备份恢复及高可用方案。
2.2 安装java、nginx、Jetty基础软件
Installing java...
download fileforjava1 success!
Installing nginx...
Package epel-release-7-11.noarch already installed and latest version
Package centos-release-scl-rh-2-3.el7.centos.noarch already installed and latest version
Package centos-release-scl-2-3.el7.centos.noarch already installed and latest version
warning: /var/cache/yum/x86_64/7/epel/packages/nginx-1.20.1-2.el7.x86_64.rpm: Header V4 RSA/SHA256 Signature, key ID 352c64e5: NOKEY
Public key for nginx-1.20.1-2.el7.x86_64.rpm is not installed
Importing GPG key 0x352C64E5:
 Userid     : "Fedora EPEL (7) <epel@fedoraproject.org>"
 Fingerprint: 91e9 7d7c 4a5e 96f1 7f3e 888f 6a2f aea2 352c 64e5
 Package    : epel-release-7-11.noarch (@extras)
 From       : /etc/pki/rpm-gpg/RPM-GPG-KEY-EPEL-7
Configure nginx certificate authentication ...
download filefornginx1 success!
download filefornginx2 success!
Generating RSA private key, 2048 bit long modulus
..................................................................................................+++
...................................................+++
e is 65537 (0x10001)
Signature ok
subject=/C=CN/ST=BeiJing/L=BeiJing/O=university/OU=university/CN=idp.university.edu.cn
Getting CA Private Key
Created symlink from /etc/systemd/system/multi-user.target.wants/nginx.service to /usr/lib/systemd/system/nginx.service.
download filefornginx4 success!
Closing seclinux...
setenforce: SELinux is disabled
Installing Jetty...
download fileforjetty01 success!
download fileforjetty02 success!
download fileforjetty03 success!
INFO  : ext             initialized in ${jetty.base}/start.ini
INFO  : webapp          transitively enabled, ini template available with --add-to-start=webapp
INFO  : server          initialized in ${jetty.base}/start.ini
INFO  : mail            transitively enabled
INFO  : servlet         transitively enabled
INFO  : jsp             initialized in ${jetty.base}/start.ini
INFO  : http-forwarded  initialized in ${jetty.base}/start.ini
INFO  : annotations     transitively enabled
INFO  : transactions    transitively enabled
INFO  : threadpool      transitively enabled, ini template available with --add-to-start=threadpool
INFO  : plus            transitively enabled
INFO  : deploy          initialized in ${jetty.base}/start.ini
INFO  : security        transitively enabled
INFO  : apache-jsp      transitively enabled
INFO  : console-capture initialized in ${jetty.base}/start.ini
INFO  : jndi            transitively enabled
INFO  : http            initialized in ${jetty.base}/start.ini
INFO  : bytebufferpool  transitively enabled, ini template available with --add-to-start=bytebufferpool
MKDIR : ${jetty.base}/lib
MKDIR : ${jetty.base}/lib/ext
MKDIR : ${jetty.base}/logs
INFO  : Base directory was modified
Created symlink from /etc/systemd/system/multi-user.target.wants/jetty.service to /usr/lib/systemd/system/jetty.service.
2.3 安装IdP软件
Installing shibbolet idp...
Buildfile: /root/shibboleth-identity-provider-4.1.7/bin/build.xml

install:
INFO [net.shibboleth.idp.installer.V4Install:158] - New Install.  Version: 4.1.7
Host Name: [idp.xxx.edu.cn] ?          #确认是服务器hostname是否正确,一般会设置hostname和IdP域名一致,此处可能显示IP地址,如果出现IP地址,请手动输入IdP服务器域名

INFO [net.shibboleth.idp.installer.V4Install:601] - Creating idp-signing, CN = idp4-xxx.xxx.edu.cn URI = https://idp.xxx.edu.cn/idp/shibboleth, keySize=3072
INFO [net.shibboleth.idp.installer.V4Install:601] - Creating idp-encryption, CN = idp.xxx.edu.cn URI = https://idp.xxx.edu.cn/idp/shibboleth, keySize=3072
Backchannel PKCS12 Password:           #设置并输入一个密码,用于创建后台证书
Re-enter password:	                   #再输入一遍
INFO [net.shibboleth.idp.installer.V4Install:644] - Creating backchannel keystore, CN = idp.xxx.edu.cn URI = https://idp.xxx.edu.cn/idp/shibboleth, keySize=3072
Cookie Encryption Key Password:        #设置并输入一个密码,用于创建Cookie加密密码
Re-enter password:                     #再输入一遍
INFO [net.shibboleth.idp.installer.V4Install:685] - Creating backchannel keystore, CN = idp.xxx.edu.cn URI = https://idp.xxx.edu.cn/idp/shibboleth, keySize=3072
INFO [net.shibboleth.utilities.java.support.security.BasicKeystoreKeyStrategyTool:166] - No existing versioning property, initializing...
SAML EntityID: [https://idp.xxx.edu.cn/idp/shibboleth] ?            #确认是正确的EntityID,主要检查域名是否正确,无误后回车,如果不是,请手动输入EntityID,注意中间不要有空格

Attribute Scope: [xxx.edu.cn] ?        #确认是本校域名,无误后回车,如果不是,请手动输入本校域名,比如:pku.edu.cn

INFO [net.shibboleth.idp.installer.V4Install:474] - Creating Metadata to /opt/shibboleth-idp/metadata/idp-metadata.xml
INFO [net.shibboleth.idp.installer.BuildWar:103] - Rebuilding /opt/shibboleth-idp/war/idp.war, Version 4.1.7
INFO [net.shibboleth.idp.installer.BuildWar:113] - Initial populate from /opt/shibboleth-idp/dist/webapp to /opt/shibboleth-idp/webpapp.tmp
INFO [net.shibboleth.idp.installer.BuildWar:92] - Overlay from /opt/shibboleth-idp/edit-webapp to /opt/shibboleth-idp/webpapp.tmp
INFO [net.shibboleth.idp.installer.BuildWar:125] - Creating war file /opt/shibboleth-idp/war/idp.war

BUILD SUCCESSFUL
Total time: 25 seconds
Enabling idp.intercept.Consent...
        conf/intercept/consent-intercept-config.xml created
        views/intercept/attribute-release.vm created
        views/intercept/terms-of-use.vm created
[OK]
2.4 选择认证对接方式(根据学校认证系统实际情况进行选择):
Please chosing your idp authentication type...
1.LDAP(easiest way)
2.CAS
3.Oauth2
4.Tencent WeChat Work(企业微信)
5.Tencent Weixiao(腾讯微校)
6.exit
Please enter your choice:#选择准备采用的认证对接的方式
download fileforldap1 success!
download fileforldap2 success!
download fileforldap3 success!
download fileforldap4 success!
download fileforall1 success!
download fileforall2 success!
download fileforall3 success!
download fileforall4 success!
download fileforall5 success!
download fileforall6 success!
download fileforall7 success!
download fileforall8 success!
download fileforall9 success!
download fileforall10 success!
2.5 重新编译war,重启nginx和jetty。
Rebuilding /opt/shibboleth-idp/war/idp.war
Buildfile: /opt/shibboleth-idp/bin/build.xml

build-war:
Installation Directory: [/opt/shibboleth-idp] ?  #直接回车

INFO [net.shibboleth.idp.installer.BuildWar:103] - Rebuilding /opt/shibboleth-idp/war/idp.war, Version 4.1.7
INFO [net.shibboleth.idp.installer.BuildWar:113] - Initial populate from /opt/shibboleth-idp/dist/webapp to /opt/shibboleth-idp/webpapp.tmp
INFO [net.shibboleth.idp.installer.BuildWar:92] - Overlay from /opt/shibboleth-idp/edit-webapp to /opt/shibboleth-idp/webpapp.tmp
INFO [net.shibboleth.idp.installer.BuildWar:125] - Creating war file /opt/shibboleth-idp/war/idp.war

BUILD SUCCESSFUL
Total time: 4 seconds
restarting Jetty...
Jetty restarted
restarting nginx...
nginx restarted...
shibboleth idp installed success!
Related pages
版权所有©北京大学计算中心