手动安装(手动第2/9步)
与ova镜像快速安装只需完成必要的主机时间同步、配置本机IdP域名、配置本机IdP证书、上传IdP Metadata等功能不同,手动安装需要管理员先下载CARSI IdP安装包,之后一步一步完成IdP的安装和配置过程。适用于对linux系统和软件包安装比较熟悉的老师。按照此文档安装完成IdP之后,下一步:配置IdP认证对接及属性定义。
请先下载安装过程需用到的文件。
1. 安装前准备
1.1 修改本机hostname
[root@www ~]# vi /etc/hostname
#将localhost.localdomain改成主机域名,例如idp.xxx.xxx.xxx
#重启
[root@www ~]# reboot
1.2 关闭selinux
#关闭SELinux
[root@www ~]#setenforce 0

#关闭开机启动SELinux
[root@www ~]# vi /etc/selinux/config
# line 7:修改为
SELINUX=disable

# 查看当前selinux状态
[root@www ~]# getenforce
Permissive #表示selinux已关闭
1.3 开放本机端口
IdP本机开放80、443端口,443端口提供web服务。80端口用于某些HTTPS证书在更新时的连接性测试(如Let's Encrypt),可根据实际情况选择是否开启。
本机防火墙上开放相应端口(http和https分别对应80和443)
注意:8443端口在SAML1协议中使用,新版IdP和SP采用SAML2协议,可以停止SAML1协议的支持,无需开启8443端口
[root@www ~]# firewall-cmd --add-service=http --permanent
[root@www ~]# firewall-cmd --add-service=https --permanent
刷新本机防火墙
[root@www ~]# firewall-cmd --reload
如果本机前面配置有其他防火墙,请联系防火墙管理员开通:外部服务器可访问本机80 、443端口(TCP端口)。
1.4 设置时间同步
Shibboleth IdP需要和其他CARSI组件严格校准时间,以保证服务正常运行。
[root@www ~]# yum -y install ntp
[root@www ~]# ntpdate -u ntp.aliyun.com
[root@www ~]# timedatectl set-timezone Asia/Shanghai
编辑 /etc/ntp.conf,注释掉默认境外ntp服务器,添加国内时间同步服务器(如阿里云)
[root@www ~]# vi /etc/ntp.conf
#server 0.centos.pool.ntp.org iburst
#server 1.centos.pool.ntp.org iburst
#server 2.centos.pool.ntp.org iburst
#server 3.centos.pool.ntp.org iburst
server ntp.aliyun.com
让时间同步开机启动,并且查看当前状态
[root@www ~]# systemctl start ntpd
[root@www ~]# systemctl enable ntpd
[root@www ~]# ntpdc -p
1.5 IPv6配置
如果要使IdP支持IPv6访问,需要为IdP域名添加AAAA记录解析,同时为IdP服务器配置IPv6地址
#域名服务器上添加AAAA记录解析,idp.xxx.xxx.xxx为idp服务器域名,xxxx:xxxx:xxxx:xxxx::xxxx为IPv6地址
idp.xxx.xxx.xxx  IN  AAAA  xxxx:xxxx:xxxx:xxxx::xxxx

#IdP服务器配置IPv6地址
[root@www ~]# vi /etc/sysconfig/network-scripts/ifcfg-ens160
#修改
IPV6INIT=yes
IPV6_AUTOCONF=no
#新增
IPV6ADDR=IPv6地址,例如xxxx:xxxx:xxxx:xxxx::xxxx/64
IPV6_DEFAULTGW=IPv6网关,例如xxxx:xxxx:xxxx:xxxx::1
[root@www ~]# systemctl restart network
2. 安装IdP运行环境
安装apache、ssl、java、tomcat等IdP运行环境。
安装apache、mod_ssl、java8、tomcat、wget:
[root@www ~]# yum -y install httpd
[root@www ~]# rm -f /etc/httpd/conf.d/welcome.conf #删除apache欢迎页面
[root@www ~]# rm -f /etc/httpd/conf.d/autoindex.conf #避免apache目录遍历漏洞
[root@www ~]# vi /etc/httpd/conf/httpd.conf
# line 86: 修改成管理员邮箱
 ServerAdmin xxx@xxx.xxx.xxx //运维联系人邮箱

# line 95: 修改成对应的域名
 ServerName idp.xxx.xxx.xxx:80

# line 151: 改成
 AllowOverride All

# line 164: 增加默认页面扩展名
 DirectoryIndex index.html index.cgi index.php

# 在配置文件最后加上
 ServerTokens Prod
 KeepAlive On

[root@www ~]# yum -y install mod_ssl java-1.8.0-openjdk java-1.8.0-openjdk-devel
[root@www ~]# yum -y install tomcat wget
配置java环境变量:
[root@www ~]# vi /etc/profile
# 在文件最后加上
export JAVA_HOME=/etc/alternatives/java_sdk_1.8.0
export PATH=$PATH:$JAVA_HOME/bin
export CLASSPATH=.:$JAVA_HOME/jre/lib:$JAVA_HOME/lib:$JAVA_HOME/lib/tools.jar

# 刷新全局变量
[root@www ~]# source /etc/profile
3. 安装&本地配置IdP
3.1 安装IdP
建议使用CARSI联盟网站提供的IdP 3.4.3版本安装包,或从Shibboleth官网下载IdP 3.4.3版本安装包。
请提前确认好Hostname(idp所使用的域名)和Attribute Scope(xxx.edu.cn)参数,安装过程中会根据这两个参数生成多个文件,且安装后无法更改。
[root@www ~]# mkdir /root/inst
[root@www ~]# cd /root/inst
[root@www ~]# wget https://shibboleth.net/downloads/identity-provider/latest/shibboleth-identity-provider-${IdP_VERSION}.tar.gz
[root@www ~]# tar xzf shibboleth-identity-provider-${IdP_VERSION}.tar.gz
[root@www ~]# cd /root/inst/shibboleth-identity-provider-${IdP_VERSION}
[root@www ~]# ./bin/install.sh
Source (Distribution) Directory (press <enter> to accept default): [/root/inst/shibboleth-identity-provider-3.x.x] #默认回车
Installation Directory: [/opt/shibboleth-idp] #默认回车
Hostname: [idp.xxx.edu.cn] enter #确认是修改后的域名,无误后回车
SAML EntityID: [https://域名/idp/shibboleth] #默认回车
Attribute Scope: [xxx.edu.cn] #输入学校域名,如xxx.edu.cn 回车
Backchannel PKCS12 Password: #创建后台证书密码
Re-enter password: #再输入一遍
Cookie Encryption Key Password: #创建Cookie加密密码
Re-enter password: #再输入一遍
Warning: /opt/shibboleth-idp/bin does not exist.
Warning: /opt/shibboleth-idp/dist does not exist.
Warning: /opt/shibboleth-idp/doc does not exist.
Warning: /opt/shibboleth-idp/system does not exist.
Warning: /opt/shibboleth-idp/webapp does not exist.
Generating Signing Key, CN = 域名 URI = https://域名/idp/shibboleth ...
...done
Creating Encryption Key, CN = 域名 = https://域名/idp/shibboleth ...
...done
Creating Backchannel keystore, CN = 域名 URI = https://域名/idp/shibboleth ...
...done
Creating cookie encryption key files...
...done
Rebuilding /opt/shibboleth-idp/war/idp.war ...
...done
BUILD SUCCESSFUL
#安装成功
3.2 配置apache和tomcat
将系统生成的为java使用的密钥转换成pem格式,供apache使用
[root@www ~]# openssl pkcs12 -in /opt/shibboleth-idp/credentials/idp-backchannel.p12 -out /opt/shibboleth-idp/credentials/idp-backchannel.key -nocerts -nodes

Enter Import Password: #输入安装过程中创建的后台证书密码
tomcat配置
#新建idp.xml
[root@www ~]# vi /etc/tomcat/Catalina/localhost/idp.xml
<Context docBase="/opt/shibboleth-idp/war/idp.war"
                privileged="true"
                antiResourceLocking="false"
                antiJARLocking="false"
                unpackWAR="false"
                swallowOutput="true" />

#定义新的AJP connector
[root@www ~]# vi /etc/tomcat/server.xml
#line 76,默认已注释掉Connector配置(此处无需修改)
<!--
     <Connector executor="tomcatThreadPool"
                port="8080" protocol="HTTP/1.1"
                connectionTimeout="20000"
                redirectPort="8443" />
-->

#在此处新增(Tomcat 7.0.100以下版本)
<Connector port="8009" address="127.0.0.1"
               enableLookups="false" redirectPort="443" protocol="AJP/1.3"
               tomcatAuthentication="false" requiredSecret="replaceyoursecret"/>
#将replaceyoursecret替换成一个安全性高、无法被轻易猜解的值,此值在idp.conf中需要用到

#将后面的配置中的<Connector port="8009" protocol="AJP/1.3" redirectPort="8443" />注释掉
<!-- <Connector port="8009" protocol="AJP/1.3" redirectPort="8443" /> -->
因为tomcat7不支持JSTL,需要的javax.servlet.jsp.jstl-1.2.1.jar和javax.servlet.jsp.jstl-api-1.2.1.jar,放入tomcat的/usr/share/tomcat/lib/路径下。
apache配置
#新建
[root@www ~]# vi /var/www/html/index.html
<script language="javascript"
type="text/javascript">
   window.location.href="/idp";
</script>

#新建
[root@www ~]# vi /etc/httpd/conf.d/ports.conf
Listen 443

#修改
[root@www ~]# vi /etc/httpd/conf/httpd.conf
#Line 42,注释掉
#Listen 80

#备份ssl.conf
[root@www ~]# cp /etc/httpd/conf.d/ssl.conf /etc/httpd/conf.d/ssl.conf.dist
将idp.conf,放入/etc/httpd/conf.d文件夹中
[root@www ~]# vi /etc/httpd/conf.d/ssl.conf
#Line 5,注释掉
# Listen 443 https
#删掉整个<VirtualHost>部分,line56-line216

[root@www ~]# vi /etc/httpd/conf.d/idp.conf
#找到
ProxyPass /idp ajp://localhost:8009/idp secret=replaceyoursecret retry=5
#将replaceyoursecret替换成/etc/tomcat/server.xml中设定的值
重启tomcat和apache
[root@www ~]# chown -R tomcat.tomcat /opt/shibboleth-idp
#启动tomcat和apache
[root@www ~]# systemctl start tomcat
[root@www ~]# systemctl enable tomcat
[root@www ~]# systemctl start httpd
[root@www ~]# systemctl enable httpd
访问https://IP地址或者域名/idp 如果看到页面内容为(注:ova方式配置需要在配置完认证对接,属性获取及释放才能看到此页面)

则表示IdP安装成功。注:此时网站使用的是自签的证书,因此使用浏览器访问可能会提示站点不安全,这时选择继续访问即可。
3.3 配置证书
采用学校提供的证书,并配置证书路径
证书由学校自行选购,也可以使用免费 lets encrypt 来进行证书,并自动续签。详细可以参考:https://eac.cloud.sh.edu.cn/document/lets_encrypt/
[root@www ~]# vi /etc/httpd/conf.d/idp.conf
# line 17、18: 改为
SSLCertificateFile cert证书绝对路径cert.pem
SSLCertificateKeyFile privkey绝对路径privkey.pem

[root@www ~]# systemctl restart httpd
[root@www ~]# systemctl restart tomcat
4. 向CARSI联盟提交IdP配置信息(上传IdP Metadata)
将/opt/shibboleth-idp/metadata/idp-metadata.xml文件下载到本地。
登陆 CARSI会员自服务系统 用户名为申请时填的学校域名,密码为申请时填的项目负责人的手机号。
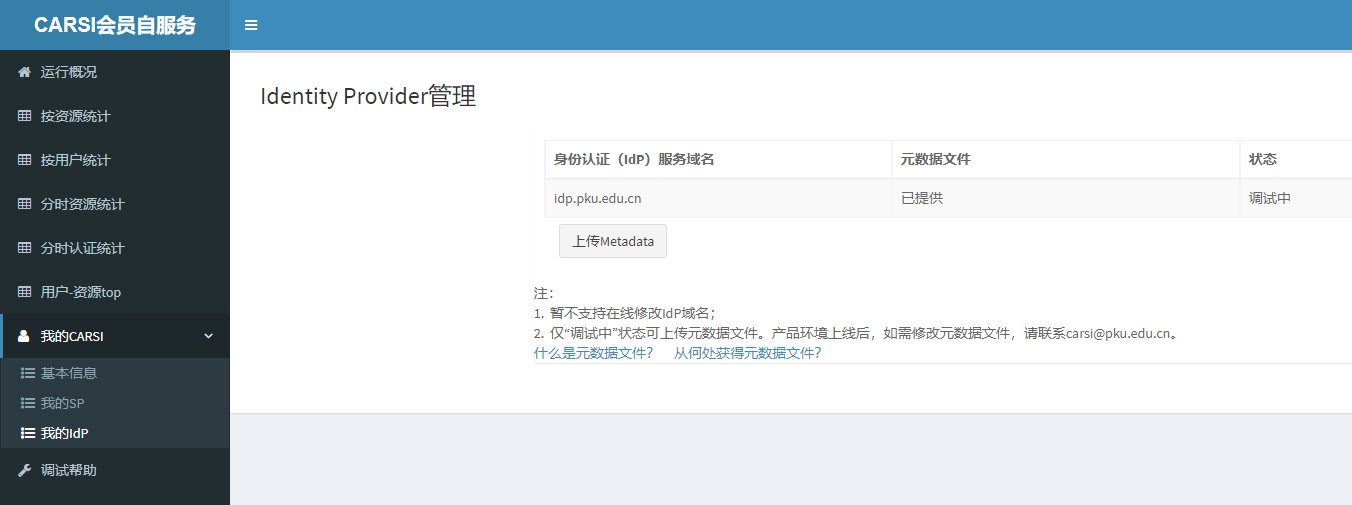
在“我的CARSI→我的IdP”中,选择“上传Metadata”完成该文件的上传,上传成功后该页面会显示“已提供”。
在预上线环境配置。下载https://dspre.carsi.edu.cn/carsifed-metadata-pre.xml 文件,放入/opt/shibboleth-idp/metadata文件夹,并且修改文件的所属用户和组。
[root@www ~]# chown -R tomcat.tomcat /opt/shibboleth-idp
将联盟提供的metadata验证证书dsmeta.pem放入/opt/shibboleth-idp/credentials目录下。修改metadata-providers.xml,maxRefreshDelay="PT10M"表示metadata最长更新时间10分钟。
[root@www ~]# vi /opt/shibboleth-idp/conf/metadata-providers.xml

#在</MetadataProvider>内新增
<MetadataProvider id="HTTPMetadata"
          xsi:type="FileBackedHTTPMetadataProvider"
          backingFile="/opt/shibboleth-idp/metadata/carsifed-metadata-pre.xml"
          minRefreshDelay="PT5M"
          maxRefreshDelay="PT10M"
          metadataURL="https://dspre.carsi.edu.cn/carsifed-metadata-pre.xml">

         <MetadataFilter xsi:type="SignatureValidation" certificateFile="/opt/shibboleth-idp/credentials/dsmeta.pem" />
         <MetadataFilter xsi:type="EntityRoleWhiteList">
             <RetainedRole>md:SPSSODescriptor</RetainedRole>
         </MetadataFilter>
     </MetadataProvider>
版权所有©北京大学计算中心