IdP认证对接方案5-腾讯微校
1. 加入微校并注册应用
按照自建应用引导申请自建应用。
logo图:建议使用carsi官方logo,
应用名称:CARSI资源服务
简介:教育网联邦认证与资源共享基础设施CARSI是中国教育和科研计算机网联邦认证与资源共享基础设施,2006年由北京大学计算中心发起建设,在国内高校已经普遍建设完成的校园网统一用户管理和身份认证系统基础上,面向中国高校和科研机构提供跨域身份认证和资源共享服务。
业务域名:请填写idp域名,idp.xxx.xxx.xxx
业务地址:请填写https://dspre.carsi.edu.cn/Shibboleth.sso/Login?SAMLDS=1&target=https%3A%2F%2Fdspre.carsi.edu.cn%2Fwxds&entityID=https%3A%2F%2F{SERVERNAME}%2Fidp%2Fshibboleth。注意:请将{SERVERNAME}替换成IdP域名,如idp.xxx.edu.cn。
记录下申请应用后应用的AppKey和AppSecret
2. 腾讯微校后台配置
进入配置,基本信息,获取学校code
应用需要用到微校认证,获取用户信息,需要用到属性,eduPersonScopedAffiliation:核心属性,标识用户的身份,取值为:faculty, student, staff, alum, member, affiliate, employee, other,后面加上@xxx.edu.cn。对应的身份分别为:教师、学生、员工、校友、成员、附属人员,聘用人员、其他。
微校后台默认身份取值其他(0)、学生(1)、教职工(4)、校友(5),请按照如下信息进行人员身份调整
{
    "errcode": 0,
    "errmsg": "ok",
    "list":
    [
        {
            "identity_type": 0,
            "name": "其他",
            "classification": 1,
            "classification_name": "其他"
        },
        {
            "identity_type": 1,
            "name": "学生",
            "classification": 2,
            "classification_name": "学生"
        },
        {
            "identity_type": 2,
            "name": "教师",
            "classification": 3,
            "classification_name": "教师"
        },
        {
            "identity_type": 3,
            "name": "员工",
            "classification": 4,
            "classification_name": "员工"
        },
        {
            "identity_type": 4,
            "name": "成员",
            "classification": 5,
            "classification_name": "成员"
        },
        {
            "identity_type": 5,
            "name": "校友",
            "classification": 6,
            "classification_name": "校友"
        },
        {
            "identity_type": 6,
            "name": "附属人员",
            "classification": 7,
            "classification_name": "附属人员"
        },
        {
            "identity_type": 7,
            "name": "聘用人员",
            "classification": 8,
            "classification_name": "聘用人员"
        }
    ]
}
3、安装配置CARSI IdP
3.1 准备IdP系统环境(CentOS8)
- 系统环境:CentOS 8 64bit 最小安装,内存≥4G,硬盘≥50G;
- IdP域名(网络中心维护,建议:idp.xxx.edu.cn;图书馆维护,建议:idp-lib.xxx.edu.cn),以及对应的https证书,域名一经确定,安装配置后无法修改;
- 网络可通达校园网外网,如果机器前面有防火墙,需要开通机器的TCP 80,443端口;
- 时间同步服务器,以ntp.aliyun.com为例,可根据校园网网络情况进行调整;
3.2 手动安装(CentOS8)
1. 基础配置(网络配置、修改主机名称、关闭selinux、配置时间同步)
#修改默认密码
[root@www ~]# passwd
#输入两次新密码

#配置网络
[root@www ~]# vi /etc/sysconfig/network-scripts/ifcfg-ens160
BOOTPROTO=static
ONBOOT=yes
IPADDR=IP地址
NETMASK=子网掩码
GATEWAY=默认网关
DNS1=DNS服务器

#修改
IPV6INIT=yes
IPV6_AUTOCONF=no
#新增
IPV6ADDR=IPv6地址,例如xxxx:xxxx:xxxx:xxxx::xxxx/64
IPV6_DEFAULTGW=IPv6网关,例如xxxx:xxxx:xxxx:xxxx::1

[root@www ~]# nmcli c reload

#修改主机名
[root@www ~]# vi /etc/hostname
#将localhost.localdomain改成主机域名,例如idp.xxx.xxx.xxx
[root@www ~]# hostname xxx.xxx.xxx.xxx
#修改hostname立即生效

#关闭SELinux
[root@www ~]#setenforce 0

#关闭开机启动SELinux
[root@www ~]# vi /etc/selinux/config
# line 7:修改为
SELINUX=disable

# 查看当前selinux状态
[root@www ~]# getenforce
Permissive #表示selinux已关闭

#配置时间同步
[root@www ~]# vi /etc/chrony.conf
#注释掉
#pool 2.centos.pool.ntp.org iburst
#新增时间同步服务器
pool ntp.aliyun.com iburst
#重启时间同步服务
[root@www ~]# systemctl restart chronyd
[root@www ~]# systemctl enable chronyd
#手动同步时间
[root@www ~]# chronyc -a makestep
200 OK #同步成功
#设置时区
[root@www ~]# timedatectl set-timezone Asia/Shanghai
#查看时间同步结果
[root@www ~]# timedatectl
               Local time: Thu 2020-07-02 14:51:24 CST
           Universal time: Thu 2020-07-02 06:51:24 UTC
                 RTC time: Thu 2020-07-02 06:51:23
                Time zone: Asia/Shanghai (CST, +0800)
System clock synchronized: yes
              NTP service: active
          RTC in local TZ: no
2.开放本机端口
IdP本机开放80、443端口,443端口提供web服务。80端口用于某些HTTPS证书在更新时的连接性测试(如Let's Encrypt),可根据实际情况选择是否开启。
本机防火墙上开放相应端口(http和https分别对应80和443)
注意:8443端口在SAML1协议中使用,新版IdP和SP采用SAML2协议,可以停止SAML1协议的支持,无需开启8443端口
[root@www ~]# firewall-cmd --add-service=http --permanent
[root@www ~]# firewall-cmd --add-service=https --permanent
刷新本机防火墙
[root@www ~]# firewall-cmd --reload
如果本机前面配置有其他防火墙,请联系防火墙管理员开通:外部服务器可访问本机80 、443端口(TCP端口)。
3.安装IdP运行环境
安装tomcat和nginx,tomcat是idp的运行容器,同时为了便于日志收集以及https证书配置,安装nginx提供web服务,用户直接访问nginx,nginx再将请求转发到tomcat,并返回该请求的响应结果。
1)安装JDK
[root@www ~]# dnf -y install java-11-openjdk java-11-openjdk-devel
[root@www ~]# cat > /etc/profile.d/java.sh <<'EOF'
export JAVA_HOME=$(dirname $(dirname $(readlink $(readlink $(which java)))))
export PATH=$PATH:$JAVA_HOME/bin
EOF
[root@www ~]# source /etc/profile.d/java.sh
[root@www ~]# java --version
openjdk 11.0.5 2019-10-15 LTS
OpenJDK Runtime Environment 18.9 (build 11.0.5+10-LTS)
OpenJDK 64-Bit Server VM 18.9 (build 11.0.5+10-LTS, mixed mode, sharing)
2)安装配置Tomcat
[root@www ~]# curl -O https://downloads.apache.org/tomcat/tomcat-9/v9.0.36/bin/apache-tomcat-9.0.36.tar.gz
[root@www ~]# tar zxvf apache-tomcat-9.0.36.tar.gz
[root@www ~]# mv apache-tomcat-9.0.36 /usr/libexec/tomcat9
[root@www ~]# useradd -M -d /usr/libexec/tomcat9 tomcat
[root@www ~]# chown -R tomcat. /usr/libexec/tomcat9
[root@dlp ~]# vi /usr/lib/systemd/system/tomcat9.service
# create new
[Unit]
Description=Apache Tomcat 9
After=network.target

[Service]
Type=oneshot
ExecStart=/usr/libexec/tomcat9/bin/startup.sh
ExecStop=/usr/libexec/tomcat9/bin/shutdown.sh
RemainAfterExit=yes
User=tomcat
Group=tomcat

[Install]
WantedBy=multi-user.target

[root@dlp ~]# systemctl enable --now tomcat9

#tomcat配置
#新建idp.xml
[root@www ~]# vi /usr/libexec/tomcat9/conf/Catalina/localhost/idp.xml
<Context docBase="/opt/shibboleth-idp/war/idp.war"
                privileged="true"
                antiResourceLocking="false"
                antiJARLocking="false"
                unpackWAR="false"
                swallowOutput="true" />

[root@www ~]# vi /usr/libexec/tomcat9/conf/server.xml
#在倒数第3行</Engine>前面,增加下述配置。从而将传递给应用的客户端ip和请求协议替换为X-Forwarded-For和X-Forwarded-Proto中的值。
   <Valve className="org.apache.catalina.valves.RemoteIpValve"
           internalProxies="127.0.0.1|0:0:0:0:0:0:0:1"
           remoteIpHeader="x-forwarded-for"
           protocolHeader="x-forwarded-proto"
    />
3)安装配置Nginx
[root@www ~]# dnf -y install nginx
[root@www ~]# vi /etc/nginx/nginx.conf
# line 41: change to your hostname
server_name www.srv.world;
#配置http自动跳转至https
在listen       [::]:80 default_server;后加上
return       301 https://$host$request_uri;
#取消注释,其中/etc/nginx/fullchain.pem请替换成证书的绝对路径,/etc/nginx/privkey.pem请替换成证书key的绝对路径
    server {
        listen       443 ssl http2 default_server;
        listen       [::]:443 ssl http2 default_server;
        server_name  idp3docker.pku6.edu.cn;
        root         /usr/share/nginx/html;

        ssl_certificate "/etc/nginx/fullchain.pem";
        ssl_certificate_key "/etc/nginx/privkey.pem";
        ssl_session_cache shared:SSL:1m;
        ssl_session_timeout  10m;
        ssl_ciphers PROFILE=SYSTEM;
        ssl_prefer_server_ciphers on;

        # Load configuration files for the default server block.
        include /etc/nginx/default.d/*.conf;

        location / {
        }

        error_page 404 /404.html;
            location = /40x.html {
        }

        error_page 500 502 503 504 /50x.html;
            location = /50x.html {
        }
    }
[root@www ~]# systemctl enable --now nginx

#新建idp.xml
[root@www ~]# vi /etc/nginx/nginx.conf
#在server标签里面新增
      location /idp {
        proxy_pass      http://localhost:8080/idp;
        proxy_set_header Host $host;
        proxy_set_header X-Forwarded-For $proxy_add_x_forwarded_for;
        proxy_set_header X-Forwarded-Proto $scheme;
      }
4. 安装配置IdP
1)安装IdP包
[root@www ~]# curl -O https://shibboleth.net/downloads/identity-provider/3.4.7/shibboleth-identity-provider-3.4.7.tar.gz
[root@www ~]# tar zxvf shibboleth-identity-provider-3.4.7.tar.gz
[root@www ~]# cd shibboleth-identity-provider-3.4.7
[root@www ~]# ./bin/install.sh
Source (Distribution) Directory (press <enter> to accept default): [/root/inst/shibboleth-identity-provider-3.x.x] #默认回车
Installation Directory: [/opt/shibboleth-idp] #默认回车
Hostname: [idp.xxx.edu.cn] enter #确认是修改后的域名,无误后回车
SAML EntityID: [https://域名/idp/shibboleth] #默认回车
Attribute Scope: [xxx.edu.cn] #输入学校域名,如xxx.edu.cn 回车
Backchannel PKCS12 Password: #创建后台证书密码
Re-enter password: #再输入一遍
Cookie Encryption Key Password: #创建Cookie加密密码
Re-enter password: #再输入一遍
Warning: /opt/shibboleth-idp/bin does not exist.
Warning: /opt/shibboleth-idp/dist does not exist.
Warning: /opt/shibboleth-idp/doc does not exist.
Warning: /opt/shibboleth-idp/system does not exist.
Warning: /opt/shibboleth-idp/webapp does not exist.
Generating Signing Key, CN = 域名 URI = https://域名/idp/shibboleth ...
...done
Creating Encryption Key, CN = 域名 = https://域名/idp/shibboleth ...
...done
Creating Backchannel keystore, CN = 域名 URI = https://域名/idp/shibboleth ...
...done
Creating cookie encryption key files...
...done
Rebuilding /opt/shibboleth-idp/war/idp.war ...
...done
BUILD SUCCESSFUL
#安装成功
2)配置IdP
Tomcat 默认没有提供 Java Server Tag Library,这使得 IdP3 的 status 页面无法显示。解决的办法是下载 jstl的jar包,然后放在 idp.home/edit-webapp/WEB-INF/lib/ 内,然后需要重新 Build 一下 idp。在 idp.home 的目录下,./bin/build.sh 即可
将no-conversation-state.rar解压缩后的no-conversation-state.jsp放到/opt/shibboleth-idp/edit-webapp里面,将shib-cas-authenticator-3.3.0.jar和cas-client-core-3.6.0.jar放到/opt/shibboleth-idp/edit-webapp/WEB-INF/lib目录下,将web.rar解压缩后的web.xml放到/opt/shibboleth-idp/edit-webapp/WEB-INF/下
[root@www ~]# cd /opt/shibboleth-idp/edit-webapp/WEB-INF/lib/
[root@www ~]# curl -O https://build.shibboleth.net/nexus/service/local/repositories/thirdparty/content/javax/servlet/jstl/1.2/jstl-1.2.jar
[root@www ~]# cd /opt/shibboleth-idp/bin
[root@www ~]# ./build.sh
Installation Directory: [/opt/shibboleth-idp] #回车
Rebuilding /opt/shibboleth-idp/war/idp.war ...
...done
BUILD SUCCESSFUL
更新idp.properties
[root@www ~]# vi /opt/shibboleth-idp/conf/idp.properties
#修改
idp.authn.flows=External
#新增,将{APPKEY}替换成应用的Appkey,将{APPSECRET}替换成应用的AppSecret,将{OCODE}替换成学校code,将{SERVERNAME}替换成idp的域名
shibcas.oauth2UrlPrefix = https://open.wecard.qq.com/connect/oauth/pc-authorize
shibcas.oauth2UrlPrefixH5 = https://open.wecard.qq.com/connect/oauth/authorize
shibcas.oauth2LoginUrl = ${shibcas.oauth2UrlPrefix}?app_key={APPKEY}&response_type=code&ocode={OCODE}&scope=snsapi_userinfo&state=STATE&connect=curLogin
shibcas.oauth2LoginUrlH5 = ${shibcas.oauth2UrlPrefixH5}?app_key={APPKEY}&response_type=code&ocode={OCODE}&scope=snsapi_userinfo&state=STATE
shibcas.serverName = https://{SERVERNAME}
shibcas.oauth2TokenUrl = https://open.wecard.qq.com/connect/oauth2/token
shibcas.oauth2ResourceUrl = https://open.wecard.qq.com/connect/oauth/get-user-info
shibcas.oauth2clientid = {APPKEY}
shibcas.oauth2clientsecret = {APPSECRET}
shibcas.oauth2redirecturi = https%3a%2f%2f{SERVERNAME}%2fidp%2fAuthn%2fExternal%3fconversation%3de1s1
shibcas.schoolurl = https://open.wecard.qq.com/cgi-bin/campus/school-info
2.1)属性定义
配置属性释放,用以下内容替换/opt/shibboleth-idp/conf/attribute-resolver.xml文件:
<?xml version="1.0" encoding="UTF-8"?>

<AttributeResolver
        xmlns="urn:mace:shibboleth:2.0:resolver"
        xmlns:xsi="http://www.w3.org/2001/XMLSchema-instance"
        xsi:schemaLocation="urn:mace:shibboleth:2.0:resolver http://shibboleth.net/schema/idp/shibboleth-attribute-resolver.xsd">

    <!-- ========================================== -->
    <!--      Attribute Definitions                 -->
    <!-- ========================================== -->

    <AttributeDefinition xsi:type="ScriptedAttribute" id="eduPersonScopedAffiliation">
        <Dependency ref="identity_type" />
        <Script><![CDATA[
        var localpart = "";
        if(typeof(identity_type)=="undefined"){
            localpart = "member";
        }else{
            if(identity_type.getValues().get(0)=="0") localpart = "member";
            else if(identity_type.getValues().get(0)=="1") localpart = "student";
            else if(identity_type.getValues().get(0)=="2") localpart = "faculty";
            else if(identity_type.getValues().get(0)=="3") localpart = "staff";
            else if(identity_type.getValues().get(0)=="4") localpart = "member";
            else if(identity_type.getValues().get(0)=="5") localpart = "alum";
            else if(identity_type.getValues().get(0)=="6") localpart = "affiliate";
            else if(identity_type.getValues().get(0)=="7") localpart = "employee";
            else localpart = "member";
        }
        eduPersonScopedAffiliation.addValue(localpart + "@%{idp.scope}");
            ]]></Script>
        <AttributeEncoder xsi:type="SAML1String" name="urn:mace:dir:attribute-def:eduPersonScopedAffiliation" encodeType="false" />
        <AttributeEncoder xsi:type="SAML2String" name="urn:oid:1.3.6.1.4.1.5923.1.1.1.9" friendlyName="eduPersonScopedAffiliation" encodeType="false" />
    </AttributeDefinition>

    <AttributeDefinition xsi:type="SubjectDerivedAttribute" id="identity_type" principalAttributeName="identity_type"></AttributeDefinition>

    <AttributeDefinition xsi:type="Scoped" id="eduPersonPrincipalName" scope="%{idp.scope}">
        <InputAttributeDefinition ref="uid" />
        <AttributeEncoder xsi:type="SAML1ScopedString" name="urn:mace:dir:attribute-def:eduPersonPrincipalName" encodeType="false" />
        <AttributeEncoder xsi:type="SAML2ScopedString" name="urn:oid:1.3.6.1.4.1.5923.1.1.1.6" friendlyName="eduPersonPrincipalName" encodeType="false" />
    </AttributeDefinition>

    <AttributeDefinition id="uid" xsi:type="PrincipalName">
        <AttributeEncoder xsi:type="SAML1String" name="urn:mace:dir:attribute-def:uid" encodeType="false" />
        <AttributeEncoder xsi:type="SAML2String" name="urn:oid:0.9.2342.19200300.100.1.1" friendlyName="uid" encodeType="false" />
    </AttributeDefinition>

    <AttributeDefinition id="eduPersonTargetedID" xsi:type="SAML2NameID" nameIdFormat="urn:oasis:names:tc:SAML:2.0:nameid-format:persistent">
        <InputDataConnector ref="ComputedIDConnector" attributeNames="computedID"/>
        <AttributeEncoder xsi:type="SAML1XMLObject" name="urn:oid:1.3.6.1.4.1.5923.1.1.1.10" encodeType="false"/>
        <AttributeEncoder xsi:type="SAML2XMLObject" name="urn:oid:1.3.6.1.4.1.5923.1.1.1.10" friendlyName="eduPersonTargetedID" encodeType="false"/>
    </AttributeDefinition>

    <AttributeDefinition id="eduPersonEntitlement" xsi:type="Simple">
        <InputDataConnector ref="staticAttributes" attributeNames="eduPersonEntitlement" />
        <AttributeEncoder xsi:type="SAML1String" name="urn:mace:dir:attribute-def:eduPersonEntitlement" encodeType="false"/>
        <AttributeEncoder xsi:type="SAML2String" name="urn:oid:1.3.6.1.4.1.5923.1.1.1.7" friendlyName="eduPersonEntitlement" encodeType="false"/>
    </AttributeDefinition>

    <DataConnector id="ComputedIDConnector" xsi:type="ComputedId" generatedAttributeID="computedID" salt="xxxxxxxxxxxxxxxxxxxx" encoding="BASE64">
        <InputAttributeDefinition ref="eduPersonPrincipalName" />
    </DataConnector>

    <DataConnector id="staticAttributes" xsi:type="Static">
        <Attribute id="eduPersonEntitlement">
        <Value>urn:mace:dir:entitlement:common-lib-terms</Value>
        </Attribute>
    </DataConnector>

</AttributeResolver>
2.2)释放用户属性
2.3)IdP隐私保护配置
2.4)Metadata配置
下载https://dspre.carsi.edu.cn/carsifed-metadata-pre.xml 文件,放入/opt/shibboleth-idp/metadata文件夹,并且修改文件的所属用户和组。
[root@www ~]# chown -R tomcat.tomcat /opt/shibboleth-idp
将联盟提供的metadata验证证书IdP认证对接方案5-腾讯微校放入/opt/shibboleth-idp/credentials目录下。修改metadata-providers.xml,maxRefreshDelay="PT10M"表示metadata最长更新时间10分钟。
[root@www ~]# vi /opt/shibboleth-idp/conf/metadata-providers.xml

#在</MetadataProvider>内新增
<MetadataProvider id="HTTPMetadata"
          xsi:type="FileBackedHTTPMetadataProvider"
          backingFile="/opt/shibboleth-idp/metadata/carsifed-metadata-pre.xml"
          minRefreshDelay="PT5M"
          maxRefreshDelay="PT10M"
          metadataURL="https://dspre.carsi.edu.cn/carsifed-metadata-pre.xml">

         <MetadataFilter xsi:type="SignatureValidation" certificateFile="/opt/shibboleth-idp/credentials/dsmeta.pem" />
         <MetadataFilter xsi:type="EntityRoleWhiteList">
             <RetainedRole>md:SPSSODescriptor</RetainedRole>
         </MetadataFilter>
     </MetadataProvider>
重启tomcat和apache
[root@www ~]# chown -R tomcat.tomcat /opt/shibboleth-idp
#启动tomcat和apache
[root@www ~]# systemctl restart tomcat9
[root@www ~]# systemctl restart nginx
2.5)日志功能
[root@www ~]# vi /opt/shibboleth-idp/conf/audit.xml

#line 18 替换
<entry key="Shibboleth-Audit" value="%T|%b|%I|%SP|%P|%IdP|%bb|%III|%u|%ac|%attr|%n|%i|%a|%s|" />

#取消注释
<bean id="shibboleth.AuditDateTimeFormat" class="java.lang.String" c:_0="YYYY-MM-dd'T'HH:mm:ss.SSSZZ" />
<util:constant id="shibboleth.AuditDefaultTimeZone" static-field="java.lang.Boolean.TRUE" />

[root@www ~]# mkdir /usr/share/nginx/html/auditlog
[root@www ~]# vi /etc/nginx/ngxin.conf

#在location /idp前增加
    location /auditlog {
        allow 115.27.243.6;
        deny all;
    }

#新建
[root@www ~]# vi /usr/share/nginx/html/auditlog/auditlog.sh
rm -rf /usr/share/nginx/html/auditlog/auditlog-`date -d -24hours +%Y-%m-%d-%H`.log
grep `date -d -1hours +%Y-%m-%dT%H` /opt/shibboleth-idp/logs/idp-audit.log > /usr/share/nginx/html/auditlog/auditlog-`date -d -1hours +%Y-%m-%d-%H`.log

#添加定时任务
[root@www ~]# crontab -e
0 */1 * * * sh /usr/share/nginx/html/auditlog/auditlog.sh >/dev/null 2>&1

#重启tomcat和apache
[root@www ~]# systemctl restart tomcat9
[root@www ~]# systemctl restart nginx
4、IdP运行测试
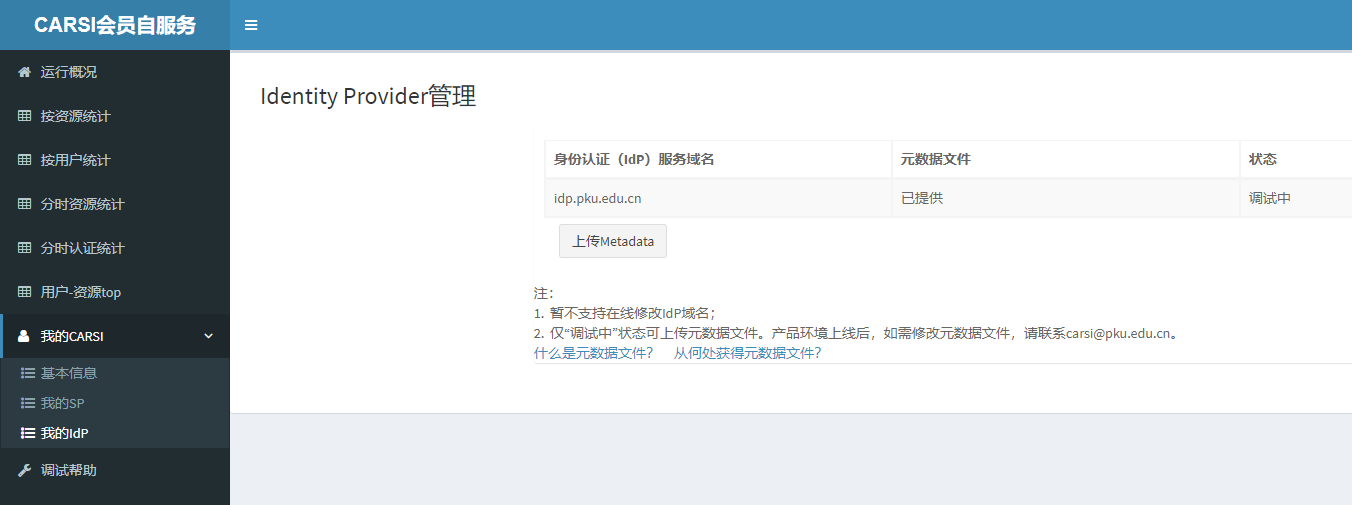
1)向CARSI联盟提交IdP配置信息(上传IdP Metadata)
将/opt/shibboleth-idp/metadata/idp-metadata.xml文件下载到本地。
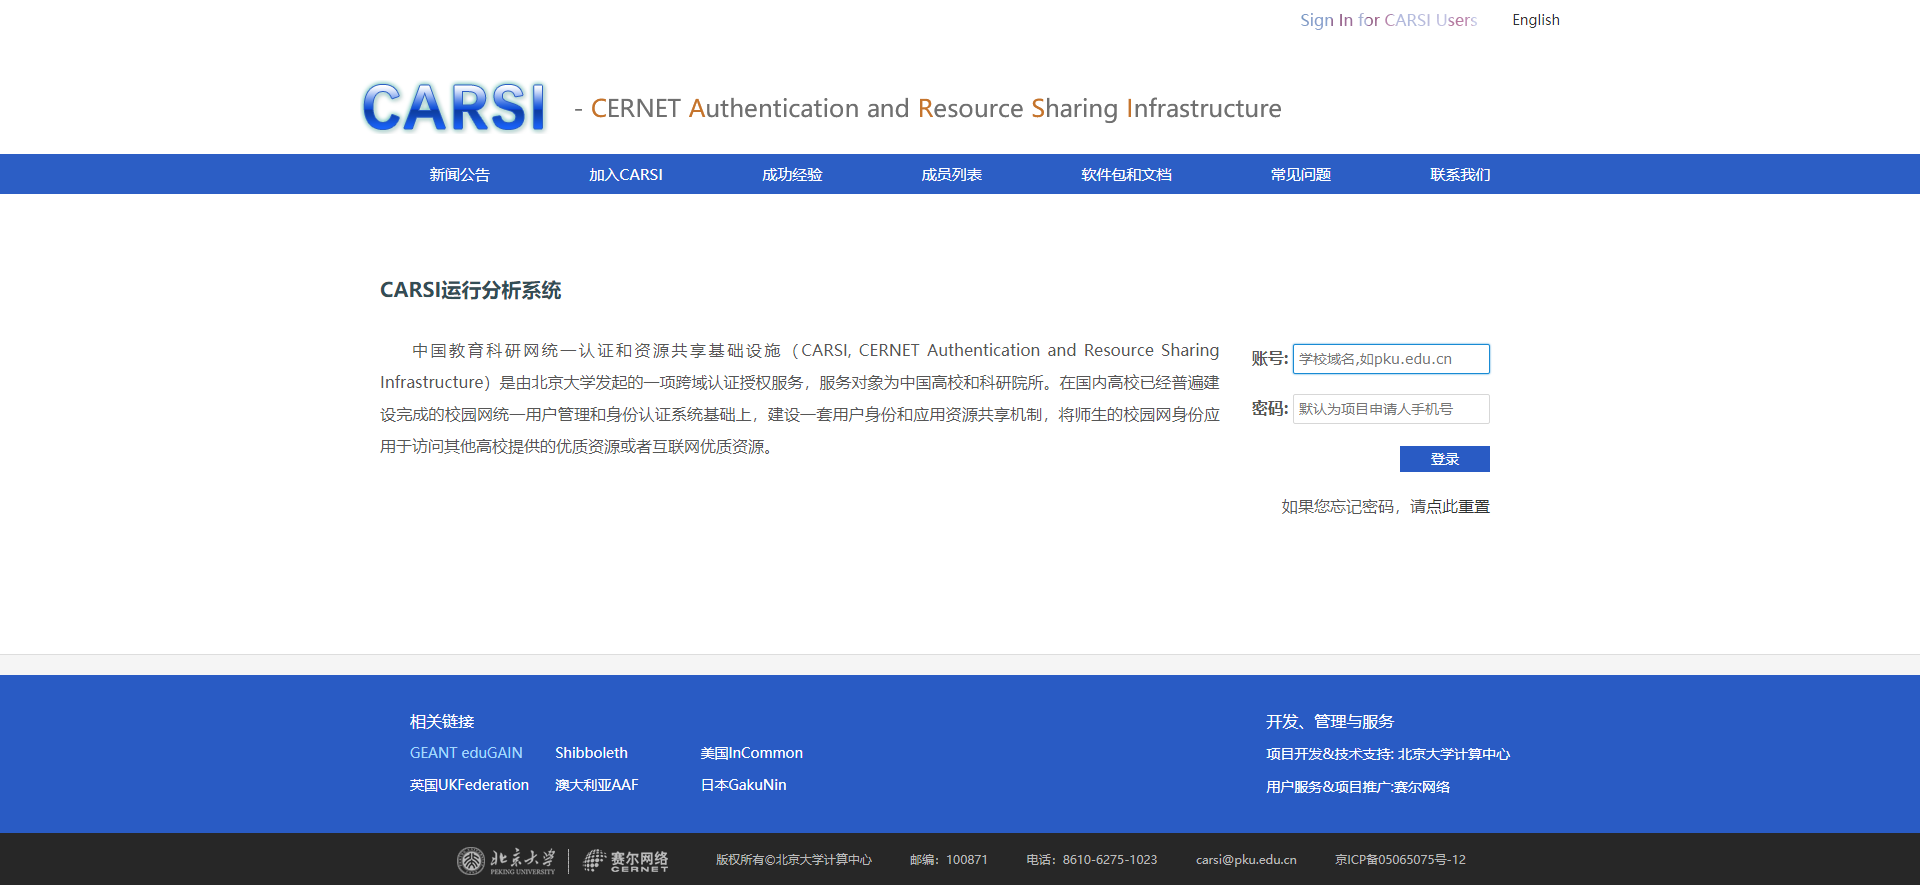
登陆 CARSI会员自服务系统 用户名为申请时填的学校域名,密码为申请时填的项目负责人的手机号。
在“我的CARSI→我的IdP”中,选择“上传Metadata”完成该文件的上传,上传成功后该页面会显示“已提供”。
2)PC端测试步骤
3)微信端测试
版权所有©北京大学计算中心